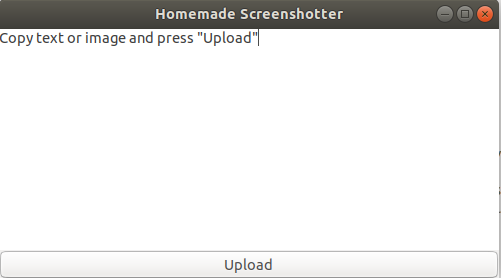
The idea of this solution came up when I’ve installed Ubuntu 18.04 for the first time and noticed then no online screenshot tools worked there, not even Joxi. So, I’ve decided to create my own solution, simply to share screenshot images and texts, for example code pieces.
Thus, Homemade Screenshotter was created. It uploads your content to your VPS servers, contains no Ads, and can be built on any desktop platform because it uses GoTK3 for GUI.
The idea
The screenshotter consists of 3 parts:
Client part (branch master)
Uploader part (branch uploader)
Static content part (branch server)
The main idea of using this tool is the following:
You copy text or image to the clipboard (Ctrl+C)
You open the Client app and press “Upload” button

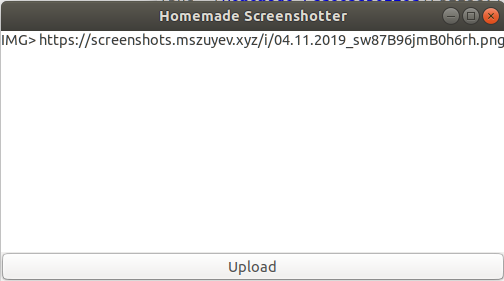
The Client app sends the content to Uploader app, running on your server. The Uploader app puts uploaded file into some folder, configured as Nginx-served site, and returns you the URL. The URL is copied to the clipboard instead of content and also appears in the main window

When you open the URL, Nginx serves it as a static content. All assets for text content is defined by Server app part.
Uploaded examples:
The installation
The Client app should be installed on your computer, while Uploader and Server on the server machine.
Client installation
Install GoTK3 on your computer. Here you can find instruction steps for any OS you use.
Open the terminal and run
git clone https://github.com/zevst/homemade_screenshotter.git, the branch you need is masterRun
cp .env.dist .env. Then, fill actual values in .env file - for exampleUPLOAD_URL=https://screenshotuploader.mszuyev.xyz/upload TMP_FOLDER=/tmp ACCESS_KEY=Long_keyRun
./install_ubuntu.sh. This scripts will build your application binary - it needs GoTK3 installed.Add application icon to Favorites (Ubuntu)
Look at the .env file we’ve created above. So, the Client will send uploaded content to https://screenshotuploader.mszuyev.xyz/upload URL and use ACCESS_KEY to make Uploader app authenticate you.
by default, for small texts (less than 80K) the PrismJS highlighter is used. It can be switched to Highlight Js easily - just rename “template/light_hljs.html” to “template/light.html” file.
Uploader installation
Open your server’s terminal, cd to the folder you want to use for Uploader
Clone the repo and run
git checkout uploaderThen make .env file -
cp .env.dist .envEdit .env with actual settings, for example
IMAGE_PATH=/imgout
STATIC_SERVER_PATH=https://screenshots.mszuyev.xyz/i/
ACCESS_KEY=Long_key
LISTEN_ADDR=0.0.0.0:7778
Using the same key in ACCESS_KEY with Client here is a must.
The listening port should be any free.
The STATIC_SERVER_PATH is a URL prefix for your uploaded content, it should be served by Nginx, as mentioned above.
To use HTTPS for your sites with Traefik and docker-compose, you can use following docker-compose config
hmsc:
build: homemade_screenshotter
image: hmsc
container_name: hmsc
user: 1000:1000 # $(id -u):$(id -g)
restart: always
volumes:
  - /some/folder/homemade_screenshotter_server/i:/imgout:rw
labels:
  - "traefik.enable=true"
  - "traefik.port=7778"
  - "traefik.docker.network=main"
  - "traefik.frontend.rule=Host:screenshotuploader.mszuyev.xyz"
  - "traefik.frontend.headers.SSLRedirect=true"
  - "traefik.frontend.headers.SSLForceHost=true"
  - "traefik.frontend.priority=40"
networks:
  - main
Here the folder /some/folder/homemade_screenshotter_server/i is to be mount as /imgout on the container. Copying files to IMAGE_PATH by Uploader means copying them to /some/folder/homemade_screenshotter_server/i that is a subfolder of Server app part, served by Nginx.
The build entry must point to the folder where the repository was cloned. It already contains Dockerfile to build container.
Server installation
Open your server’s terminal,
cdto the folder you want to use for ServerClone the repo and run
git checkout serverJust make this folder served by Nginx under the host name, set in STATIC_SERVER_PATH for the Uploader app part. So, when your uploader returned you an URL of type https://screenshots.mszuyev.xyz/i/smth.html, it’s expected from Nginx to seek for “smth.html” in “i” subfolder of this repo, branch Server. For example:
server {
	listen 80;
	server_name screenshots.mszuyev.xyz;
	root ;
	index index.html;

	location / {
		try_files $uri /index.html$is_args$args;
	}
}
The following docker-compose config part can be useful if you run docker-compose and use HTTPS for your sites with Traefik:
  server:
    image: nginx:alpine
    container_name: nginx
    restart: always
    working_dir: /etc/nginx/conf.d/
    volumes:
      - /some/folder/homemade_screenshotter_server:/var/www_root/homemade_screenshotter_server:rw
      - ./conf/nginx:/etc/nginx/conf.d:ro
    labels:
      - "traefik.enable=true"
      - "traefik.frontend.rule=HostRegexp:{subdomain:[a-z0-9]+}.mszuyev.xyz"
      - "traefik.port=80"
      - "traefik.docker.network=main"
      - "traefik.frontend.headers.SSLRedirect=true"
      - "traefik.frontend.headers.SSLForceHost=true"
      - "traefik.frontend.priority=1"
    entrypoint: [nginx-debug, '-g', 'daemon off;']
    networks:
      - main
The rule traefik.frontend.rule=HostRegexp:{subdomain:[a-z0-9]+}.mszuyev.xyz means that nginx serves several subdomains here, not only screenshots.mszuyev.xyz. Elsewhere, traefik.frontend.rule=Host:screenshots.mszuyev.xyz could be better.
To be continued
I have been using this tool for ~1.5 years. For now, it collected ~1200 files which occupy only 90M on my server, so I haven’t implemented any tool to clean old files, probably I’ll do it in the future.
This tool is going to be improved in the future. If you have any ideas or want to use it - feel free to connect me by telegram/linkedin, my contacts are on the Menu side.